Woomy-TikTok ランキング

あつメシ

働くパパでも簡単で家族が喜ぶ食事を投稿してます♪

👇👇👇👇

ご本人の方はこちら
フォロー中
21
フォロワー
243,595
総いいね
4,146,283
動画数
828
更新: 2026/09/24
PR依頼 @atu_meshi さんはWoomy未登録です。依頼は保管され、登録されると届きます
PR依頼フォーム
PR投稿パフォーマンス 0件
平均
Average
再生
0
保存
0
いいね
0
コメント
0
シェア
0
DL
0

中央値
Median
再生
0
保存
0
いいね
0
コメント
0
シェア
0
DL
0
選択中投稿のリアルタイム集計
0 件選択されています
再生(平均) 0
再生(中央値) 0
保存(平均) 0
保存(中央値) 0
投稿一覧 273 件
最新のPR投稿8件
PR
0:17
3,883 3,883回再生 投稿から14日15時間50分後(351時間)(2026.09.24 12:14時点で取得) 確定待ち

「エビとコーンのバター炊き込みご飯」 材料(3〜4人分) ・お米 … 2合 ・むきえび(冷凍)… 150〜200g ・コーン缶 … 100g(実のみ使用) ・玉ねぎ … 1/2個(約100g) 【材料A】 ・醤油 … 大さじ3 ・料理酒 … 大さじ1 ・有塩バター … 15g(炊き込み用) ・水 … 適量(約350ml〜) (材料Aを入れた後、2合の目盛りちょうどまで入れる) (仕上げ用・お好みで) ・有塩バター … 5g ・刻みネギ…適量 ⸻ 作り方 ① 下準備 ・冷凍えびは塩水(3%)で10〜15分解凍し水気を拭き取る ・玉ねぎは5mm角の粗みじん切りにする ・コーンは汁気をしっかり切る ・米は洗って30分吸水させ、ザルにあげる。 ② 炊く 炊飯釜に洗ったお米を入れ、【材料A】を加え、玉ねぎ・コーン・えびを上にのせ、有塩バター15gを置く。炊飯する。 ※具材は混ぜない。 ③ 仕上げ 炊き上がったらすぐ混ぜず 2分蒸らす。 その後さっくり混ぜ、お好みで仕上げにバターを加えて完成! Butter Shrimp & Corn Takikomi Gohan Serves 3–4 Ingredients • 2 cups (Japanese rice-measuring cups) uncooked rice • 150–200 g peeled shrimp (frozen) • 100 g canned corn (drained, kernels only) • 1/2 onion (about 100 g) [A] • 3 tbsp soy sauce • 1 tbsp cooking sake • 15 g salted butter (for cooking) • Water … as needed (about 350 ml or more) After adding [A], fill with water to the 2-cup line in the rice cooker. For finishing (optional) • 5 g salted butter • Chopped green onions, to taste ⸻ Instructions 1. Preparation • Thaw the frozen shrimp in 3% salt water for 10–15 minutes, then pat dry. • Finely dice the onion into about 5 mm pieces. • Drain the corn well. • Wash the rice, let it soak for 30 minutes, then drain in a sieve. 2. Cook Place the washed rice in the rice cooker and add [A]. Top with the onion, corn, and shrimp, then place the 15 g butter on top. Cook using the regular rice setting. Do not mix the ingredients before cooking. 3. Finish Once cooked, let it rest for 2 minutes without mixing. Gently fluff the rice, and add extra butter and chopped green onions if desired. Serve. #cooking #japanesefood #yummy

著作権楽曲
129 いいね 129投稿から14日15時間50分後
(351時間)

(2026.09.24 12:14時点で取得)
3 コメント 3投稿から14日15時間50分後
(351時間)

(2026.09.24 12:14時点で取得)
9 シェア 9投稿から14日15時間50分後
(351時間)

(2026.09.24 12:14時点で取得)
39 保存 39投稿から14日15時間50分後
(351時間)

(2026.09.24 12:14時点で取得)
2 DL 2投稿から14日15時間50分後
(351時間)

(2026.09.24 12:14時点で取得)
2026.09.24 12:14 時点 確定待ち 投稿から14日15時間50分後(351時間)
PR
0:17
241,049 241,049回再生 投稿から12日22時間11分後(310時間)(2026.07.05 15:11時点で取得) 確定待ち

『牛ミンチの韓国風炊き込みご飯』 【材料(3〜4人分)】 ・米…2合 ・牛ミンチ…200g ・もやし…1/2袋(100g) ・にんじん…1/2本 ・玉ねぎ…1/2個 〈調味料〉 ・焼肉のたれ…大さじ5 ・しょうゆ…小さじ2 ・コチュジャン…大さじ1 ・顆粒鶏ガラスープの素…小さじ2 ・ごま油…小さじ2 ・おろしにんにく…小さじ1 〈仕上げ〉 ・卵黄…2〜4個 ・白いりごま…適量 ・小ねぎ…適量 ⸻ 【作り方(3工程)】 ① 下準備 にんじんは細切りにする。 玉ねぎは薄切りにする。 炊飯器に洗った米、〈調味料〉を入れる。 2合の目盛りより大さじ3少なめに水を加え、軽く混ぜる。 ⸻ ② 炊飯する 牛ミンチ、玉ねぎ、にんじん、もやしをのせる。 通常炊飯する。 炊き上がったら、そのまま10〜15分保温する。 ⸻ ③ 仕上げる 全体をよく混ぜる。 器に盛り、卵黄、白いりごま、小ねぎをのせたら完成。 ⸻ 【ポイント】 ・牛ミンチの旨みがご飯に染み込んで絶品♪ ・水を少し減らしておこげを作りやすく♪ ・炊飯後に保温すると香ばしさアップ♪ ・卵黄を絡めるとまろやかでやみつき♪ ・焼肉のたれだけで味が決まりやすい♪ Korean-Style Ground Beef Rice Ingredients (3–4 servings) ・2 cups rice ・200g ground beef ・100g bean sprouts ・1/2 carrot ・1/2 onion 〈Seasoning mix〉 ・5 tbsp yakiniku sauce ・2 tsp soy sauce ・1 tbsp gochujang ・2 tsp chicken stock powder ・2 tsp sesame oil ・1 tsp grated garlic 〈Toppings〉 ・2–4 egg yolks ・White sesame seeds, to taste ・Green onion, to taste ⸻ Instructions ① Prepare the ingredients Julienne the carrot. Thinly slice the onion. Add the washed rice and all seasonings to the rice cooker. Pour in water to slightly below the 2-cup line (about 3 tbsp less than usual) and mix gently. ⸻ ② Cook Top with the ground beef, onion, carrot, and bean sprouts. Press Cook Rice and cook as usual. Once cooked, keep warm for 10–15 minutes. ⸻ ③ Finish Mix everything well. Serve in bowls and top with egg yolks, sesame seeds, and green onion. Enjoy! ⸻ Tips ・The beef adds rich flavor throughout the rice. ・Using slightly less water helps create a crispy rice bottom. ・Keeping it warm after cooking enhances the aroma. ・Mixing in the egg yolk makes it extra creamy and delicious. ・The yakiniku sauce does most of the seasoning work, making this recipe easy and foolproof. 🍚🥩🥚✨ #料理 #cooking #japanesefood #RiceCookerRecipe #炊飯器レシピ

著作権楽曲
7,152 いいね 7,152投稿から12日22時間11分後
(310時間)

(2026.07.05 15:11時点で取得)
40 コメント 40投稿から12日22時間11分後
(310時間)

(2026.07.05 15:11時点で取得)
1,287 シェア 1,287投稿から12日22時間11分後
(310時間)

(2026.07.05 15:11時点で取得)
4,956 保存 4,956投稿から12日22時間11分後
(310時間)

(2026.07.05 15:11時点で取得)
202 DL 202投稿から12日22時間11分後
(310時間)

(2026.07.05 15:11時点で取得)
2026.07.05 15:11 時点 確定待ち 投稿から12日22時間11分後(310時間)
あつメシのTikTok投稿
PR
0:17
41,910 41,910回再生 投稿から6日18時間17分後(162時間)(2026.05.28 11:17時点で取得) 確定待ち

『じゃがいもとひき肉の甘辛バター煮』 【材料(3〜4人分)】 ・じゃがいも … 3個(約450g) ・合いびき肉 … 150g 〈合わせ調味料〉 ・醤油 … 大さじ2 ・みりん … 大さじ2 ・料理酒 … 大さじ2 ・砂糖 … 大さじ1 ・しょうがすりおろし … 小さじ1/2 ・水 … 200ml ・片栗粉 … 小さじ2 ・水(片栗粉用)… 小さじ4 ・バター … 10g ・刻みネギ … お好みで ⸻ 【作り方】 ① 下準備 じゃがいもはよく洗い、芽を取り、大きいものはひと口大に切る。 ② 炊飯する 炊飯器にじゃがいもを入れ、上から合いびき肉を広げてのせる。 〈合わせ調味料〉を加え、通常炊飯モードで炊く。 ③ とろみをつける 炊き上がったら一度スイッチを切り、水で溶いた片栗粉を加えてやさしく混ぜる。 バターを加え、再び5分ほど加熱してとろみがついたら完成です♪ お好みで刻みネギをのせてお召し上がりください♪ Sweet & Savory Buttered Potatoes with Ground Meat Ingredients (3–4 servings) ・Potatoes…3 (about 450g) ・Mixed ground meat…150g 〈Seasoning mix〉 ・Soy sauce…2 tbsp ・Mirin…2 tbsp ・Cooking sake…2 tbsp ・Sugar…1 tbsp ・Grated ginger…1/2 tsp ・Water…200ml ・Potato starch…2 tsp ・Water (for slurry)…4 tsp ・Salted butter…10g ・Chopped green onions…optional ⸻ Instructions ① Prep Wash the potatoes well and remove any sprouts. Cut larger potatoes into bite-sized pieces. ⸻ ② Cook in the rice cooker Place the potatoes in the rice cooker and spread the mixed ground meat over the top. Add the seasoning mix and cook using the regular rice cooker setting. ⸻ ③ Finish Once cooked, turn off the rice cooker and gently stir in the potato starch slurry. Add the butter and heat again for about 5 minutes until slightly thickened. Top with chopped green onions if desired and enjoy♪ ⸻ 🔥Tips ・Cooking in the rice cooker makes it easy and hands-off ・Adding the slurry creates a rich, glossy finish ・Butter adds extra richness and flavor #cooking #EasyRecipes #japanesefood #ricecookerrecipes #料理

著作権楽曲
1,122 いいね 1,122投稿から6日18時間17分後
(162時間)

(2026.05.28 11:17時点で取得)
3 コメント 3投稿から6日18時間17分後
(162時間)

(2026.05.28 11:17時点で取得)
68 シェア 68投稿から6日18時間17分後
(162時間)

(2026.05.28 11:17時点で取得)
533 保存 533投稿から6日18時間17分後
(162時間)

(2026.05.28 11:17時点で取得)
26 DL 26投稿から6日18時間17分後
(162時間)

(2026.05.28 11:17時点で取得)
2026.05.28 11:17 時点 確定待ち 投稿から6日18時間17分後(162時間)
あつメシのTikTok投稿
PR
1:59
4,623 4,623回再生 投稿から4日9時間47分後(105時間)(2026.05.06 01:10時点で取得) 確定待ち

『ちくわチーズのパリパリ餃子』 【材料(10本分)】 ・ちくわ…10本 ・ベビーチーズ…10個 ・大葉…10枚(縦半分に切る) ・餃子の皮…20枚 (その他) ・水…適量 ・揚げ油…大さじ4(こめ油使用) ⸻ 【作り方(3工程)】 ① 下準備 ちくわの片側に縦の切り込みを入れる。 中にベビーチーズを入れてはさみ、横半分に切る。(計20個) ⸻ ② 巻く 餃子の皮に半分に切った大葉をのせ、その上に①のちくわを置く。 棒餃子のようにくるっと巻き、巻き終わりに水をつけてしっかり留める。 ⸻ ③ 焼く フライパンに油を熱し、②を閉じ目を下にして並べる。 こんがりと焼き色がつくまで焼いたら完成。 ⸻ 🔥ポイント ・大葉は外側=香り&見た目UP ・閉じ目を下に焼く=剥がれ防止 ・こんがり焼く=パリパリ食感UP Crispy Chikuwa Cheese Gyoza Ingredients (10 pieces) ・Chikuwa…10 ・Baby cheese…10 ・Shiso leaves…10 (cut in half lengthwise) ・Gyoza wrappers…20 (Other) ・Water…as needed ・Oil for frying…4 tbsp (rice oil) ⸻ Instructions ① Prep Make a slit lengthwise on one side of each chikuwa. Insert baby cheese, sandwich it, then cut in half crosswise (20 pieces total). ⸻ ② Wrap Place half a shiso leaf on a gyoza wrapper, then put the chikuwa on top. Roll like a stick-style gyoza and seal the edge with water. ⸻ ③ Cook Heat oil in a pan and place them seam-side down. Cook until golden and crispy. ⸻ 🔥Tips ・Shiso on the outside = better aroma & look ・Place seam-side down = prevents opening ・Cook until golden = extra crispy texture #料理 #cooking #japanesefood #ちくわ

105 いいね 105投稿から4日9時間47分後
(105時間)

(2026.05.06 01:10時点で取得)
1 コメント 1投稿から4日9時間47分後
(105時間)

(2026.05.06 01:10時点で取得)
5 シェア 5投稿から4日9時間47分後
(105時間)

(2026.05.06 01:10時点で取得)
29 保存 29投稿から4日9時間47分後
(105時間)

(2026.05.06 01:10時点で取得)
2 DL 2投稿から4日9時間47分後
(105時間)

(2026.05.06 01:10時点で取得)
2026.05.06 01:10 時点 確定待ち 投稿から4日9時間47分後(105時間)
あつメシのTikTok投稿
PR
0:17
61,922 61,922回再生 投稿から6日3時間18分後(147時間)(2026.04.25 18:14時点で取得) 確定待ち

『カニカマと大葉の酢飯おにぎり』 【材料(2人分)】 ・温かいご飯…250g ・カニカマ…4本(約30g) ・大葉…3枚 ・白いりごま…小さじ2 ・寿司酢…大さじ1 (※ミツカンかんたん酢使用) ・塩…ふたつまみ ⸻ 【作り方(3工程)】 ① 下準備 大葉は細かくみじん切りにする。 カニカマは1cm幅に切る。 ⸻ ② 混ぜる ボウルにご飯・カニカマ・大葉・白いりごま・寿司酢・塩を入れる。 底からやさしく混ぜる。 ⸻ ③ 握る 食べやすい大きさにおにぎりの形に握ったら完成。 ⸻ 🔥ポイント ・混ぜすぎない=ふんわり仕上げ ・温かいご飯で作る=まとまりやすい Crab Stick & Shiso Sushi Onigiri Ingredients (2 servings) ・Warm rice…250g ・Crab sticks…4 (about 30g) ・Shiso leaves…3 ・White sesame seeds…2 tsp ・Sushi vinegar…1 tbsp (used Mizkan Kantan Vinegar) ・Salt…2 pinches ⸻ Instructions ① Prep Finely chop the shiso leaves. Cut the crab sticks into 1 cm pieces. ⸻ ② Mix In a bowl, combine rice, crab sticks, shiso, sesame seeds, sushi vinegar, and salt. Gently mix from the bottom. ⸻ ③ Shape Form into onigiri (rice balls) and serve. ⸻ 🔥Tips ・Don’t overmix = keeps it fluffy ・Use warm rice = easier to shape #料理 #cooking #japanesefood #onigiri

著作権楽曲
1,529 いいね 1,529投稿から6日3時間18分後
(147時間)

(2026.04.25 18:14時点で取得)
3 コメント 3投稿から6日3時間18分後
(147時間)

(2026.04.25 18:14時点で取得)
74 シェア 74投稿から6日3時間18分後
(147時間)

(2026.04.25 18:14時点で取得)
437 保存 437投稿から6日3時間18分後
(147時間)

(2026.04.25 18:14時点で取得)
13 DL 13投稿から6日3時間18分後
(147時間)

(2026.04.25 18:14時点で取得)
2026.04.25 18:14 時点 確定待ち 投稿から6日3時間18分後(147時間)
あつメシのTikTok投稿
PR
0:17
100,950 100,950回再生 投稿から4日8時間14分後(104時間)(2026.03.21 01:20時点で取得) 確定待ち

『鮭と大葉の香り炊き込みご飯』 【材料(3〜4人分)】 ・お米…2合 ・鮭…2切れ(骨取り) 〈調味料〉 ・料理酒…大さじ2 ・しょうゆ…大さじ1 ・顆粒和風だし…小さじ2 (仕上げ) ・大葉…5枚〜 ・白いりごま…大さじ1 ・ごま油…小さじ2 ⸻ 【作り方(3工程)】 ① 下準備 お米を洗う。 大葉は千切りにする。 ⸻ ② 炊飯 炊飯釜にお米・料理酒・しょうゆ・顆粒だしを入れる。 2合の目盛りまで水を加えて軽く混ぜ、鮭をのせて通常炊飯する。 ⸻ ③ 仕上げ 炊き上がったら鮭をほぐす。 白いりごまとごま油を加えてさっくり混ぜる。 器に盛り、千切りにした大葉をのせたら完成。 ※骨がある場合は取り除いてください。 ※皮が気になる方は取ってください。 Salmon & Shiso Takikomi Gohan (Fragrant Japanese Mixed Rice) Ingredients (3–4 servings) • Rice…2 cups • Salmon fillets (boneless)…2 Seasonings • Cooking sake…2 tbsp • Soy sauce…1 tbsp • Dashi powder…2 tsp Finish • Shiso leaves…5 or more • White sesame seeds…1 tbsp • Sesame oil…2 tsp ⸻ Instructions (3 Steps) ① Prep Wash the rice. Julienne the shiso leaves. ⸻ ② Cook Add the rice, cooking sake, soy sauce, and dashi powder to the rice cooker. Add water up to the 2-cup line and mix lightly. Place the salmon on top and cook using the normal rice setting. ⸻ ③ Finish When the rice is done, flake the salmon. Add the white sesame seeds and sesame oil and gently mix. Serve in a bowl and top with shredded shiso leaves. If the salmon has bones, remove them before serving. If you prefer, remove the skin as well. #cooking #japanesefood #yummy #ricecooker

著作権楽曲
3,493 いいね 3,493投稿から4日8時間14分後
(104時間)

(2026.03.21 01:20時点で取得)
18 コメント 18投稿から4日8時間14分後
(104時間)

(2026.03.21 01:20時点で取得)
353 シェア 353投稿から4日8時間14分後
(104時間)

(2026.03.21 01:20時点で取得)
1,659 保存 1,659投稿から4日8時間14分後
(104時間)

(2026.03.21 01:20時点で取得)
60 DL 60投稿から4日8時間14分後
(104時間)

(2026.03.21 01:20時点で取得)
2026.03.21 01:20 時点 確定待ち 投稿から4日8時間14分後(104時間)
あつメシのTikTok投稿
PR
0:38
5,721 5,721回再生 投稿から4日9時間19分後(105時間)(2026.03.05 17:30時点で取得) 確定待ち

🔗 https://amzn.to/4rEMfaL 【アマゾン新生活SALE 開催中】 ⏳ キャンペーン期間:3月3日~3月9日 💰 Aladdin Poca価格: 69,900円 → キャンペーン価格 52,990円 おうち時間がちょっと特別になるアイテムに出会いました✨ その名も「Aladdin Poca(アラジン ポカ)」。 これ、ただのプロジェクターじゃなくて ✔ 配線いらずでどこでも使える ✔ 大画面で映画やYouTubeがすぐ観れる ✔ スピーカーにもライトにもなる という、“置くだけで空間が変わる”アイテムなんです。 今回の動画では、料理をしながら大画面で動画を流してみたのですが、 手元はキッチン作業に集中できるのに、空間はしっかりエンタメ感があって新鮮でした。 子どもたちもプロジェクターに映る大画面にくぎ付け! 「映画館みたい!」ととても楽しんでいました♪ 配線いらずでサッと使えて、 リビングでも寝室でも“置くだけ”で雰囲気が変わるのが嬉しいポイントです。 #AladdinX #AladdinPoca #プロジェクター #PR

プロジェクター,Aladdin Poca,ポータブル,スピーカー
66 いいね 66投稿から4日9時間19分後
(105時間)

(2026.03.05 17:30時点で取得)
0 コメント 0投稿から4日9時間19分後
(105時間)

(2026.03.05 17:30時点で取得)
0 シェア 0投稿から4日9時間19分後
(105時間)

(2026.03.05 17:30時点で取得)
5 保存 5投稿から4日9時間19分後
(105時間)

(2026.03.05 17:30時点で取得)
0 DL 0投稿から4日9時間19分後
(105時間)

(2026.03.05 17:30時点で取得)
2026.03.05 17:30 時点 確定待ち 投稿から4日9時間19分後(105時間)
あつメシのTikTok投稿
PR
0:17
19,146 19,146回再生 投稿から16日17分後(384時間)(2026.03.05 17:30時点で取得) 確定待ち

『ヤンニョム風唐揚げおにぎり』 材料(2人分) ・唐揚げ … 4個 ・スイートチリソース … 大さじ2 ・ケチャップ … 大さじ2 ・白いりごま … 小さじ2 ・温かいご飯 … 250g ・グリーンリーフ … 2枚 ・おにぎり用海苔 … 適量 ⸻ 作り方(3工程) ① 和える 唐揚げにスイートチリソース・ケチャップ・白いりごまを加え、全体にしっかり絡める。 グリーンリーフは一口大にちぎっておく。 ② 包む ラップにご飯 → グリーンリーフ → ソースを絡めた唐揚げをのせる。 周りのご飯で包みながら、ラップを使っておにぎりの形に握る。 ③ 仕上げ 海苔を巻いたら完成。 ⸻ ポイント ・甘辛ソースが唐揚げに絡むことで、冷めても美味しい◎ ・グリーンリーフを入れると、こってり感が和らぎ食べやすくなります。 ・ボリューム満点で、これ1個でも大満足のおにぎりです。 ⸻ Sweet & Spicy Karaage Onigiri Ingredients (Serves 2) • 4 pieces karaage (Japanese fried chicken) • 2 tbsp sweet chili sauce • 2 tbsp ketchup • 2 tsp white sesame seeds • 250 g warm cooked rice • 2 leaves green leaf lettuce • Nori (for wrapping), as needed ⸻ Directions (3 Steps) ① Mix Combine the karaage, sweet chili sauce, ketchup, and white sesame seeds. Toss well until evenly coated. Tear the green leaf lettuce into bite-size pieces. ② Wrap Place rice on a sheet of plastic wrap, add lettuce, then place the sauced karaage on top. Cover with more rice and shape firmly into an onigiri using the wrap. ③ Finish Wrap with nori and serve. ⸻ Tips • The sweet and spicy sauce keeps the karaage flavorful even after it cools. • Adding lettuce balances the richness and makes it easier to eat. • A hearty, satisfying onigiri that works great as a meal on its own. #cooking #japanesefood #yummy #onigiri

著作権楽曲
356 いいね 356投稿から16日17分後
(384時間)

(2026.03.05 17:30時点で取得)
3 コメント 3投稿から16日17分後
(384時間)

(2026.03.05 17:30時点で取得)
21 シェア 21投稿から16日17分後
(384時間)

(2026.03.05 17:30時点で取得)
109 保存 109投稿から16日17分後
(384時間)

(2026.03.05 17:30時点で取得)
1 DL 1投稿から16日17分後
(384時間)

(2026.03.05 17:30時点で取得)
2026.03.05 17:30 時点 確定待ち 投稿から16日17分後(384時間)
すべての投稿新しい順
0:18
29,118 29,118回再生 投稿から3日18時間22分後(90時間)(2026.09.24 12:14時点で取得) 暫定・あと8日で確定

『ふわっと卵のキムチ豆腐スープ』 材料(2〜3人分) ・キムチ … 100g ・絹豆腐 … 1パック(250g) ・しめじ … 1袋(100g) ・ニラ … 15g ・たまご … 2個 水溶き片栗粉 ・片栗粉 … 大さじ1 ・水 … 大さじ1 【スープ】 ・水 … 600ml ・顆粒鶏ガラスープの素 … 大さじ2 ・醤油 … 大さじ1 ⸻ 作り方 ① 下準備 ・しめじは石づきを落としてほぐす ・ニラは4cm幅に切る ・たまごは溶いておく ② 煮る 鍋に【スープ】の材料を入れて中火にかける。 煮立ったらキムチ・しめじ・ニラを加え、 豆腐をスプーンですくいながら入れて再度煮立てる。 ③ 仕上げ 火を弱火にし、混ぜながら水溶き片栗粉を回し入れる。 とろみがついたら溶き卵をふんわり回し入れ、 卵が固まったら火を止めて完成。 Fluffy Egg Kimchi Tofu Soup 📝 Ingredients (Serves 2–3) • Kimchi … 100g • Silken tofu … 1 pack (250g) • Shimeji mushrooms … 1 pack (100g) • Garlic chives … 15g • Eggs … 2 Potato Starch Slurry • Potato starch … 1 tbsp • Water … 1 tbsp Soup • Water … 600ml • Chicken stock powder … 2 tbsp • Soy sauce … 1 tbsp ⸻ 👩‍🍳 Instructions ① Preparation • Remove the base of the shimeji mushrooms and separate them • Cut the garlic chives into 4cm pieces • Beat the eggs ② Simmer Add all the soup ingredients to a pot and heat over medium heat. Once boiling, add the kimchi, shimeji mushrooms, and garlic chives. Scoop the tofu into bite-sized pieces with a spoon and add to the pot. Bring back to a gentle boil. ③ Finish Reduce to low heat and slowly stir in the potato starch slurry. Once thickened, gently pour in the beaten eggs in a circular motion. When the eggs become fluffy, turn off the heat and serve. #料理 #cooking #japanesefood #スープ

著作権楽曲
848 いいね 848投稿から3日18時間22分後
(90時間)

(2026.09.24 12:14時点で取得)
1 コメント 1投稿から3日18時間22分後
(90時間)

(2026.09.24 12:14時点で取得)
46 シェア 46投稿から3日18時間22分後
(90時間)

(2026.09.24 12:14時点で取得)
500 保存 500投稿から3日18時間22分後
(90時間)

(2026.09.24 12:14時点で取得)
5 DL 5投稿から3日18時間22分後
(90時間)

(2026.09.24 12:14時点で取得)
2026.09.24 12:14 時点 暫定・あと8日で確定 投稿から3日18時間22分後(90時間)
0:17
20,150 20,150回再生 投稿から5日16時間7分後(136時間)(2026.09.24 12:14時点で取得) 暫定・あと7日で確定

『レタスとカニカマのうま塩無限サラダ』 【材料(2〜3人分)】 ・レタス(小)…1玉(約200g) ・カニカマ…10本 〈合わせ調味料〉 ・鶏ガラスープの素…小さじ2 ・きび糖…小さじ1/2 ・ごま油…大さじ1と1/2 ・白いりごま…小さじ2 ・塩…適量 【作り方(3工程)】 ① 下準備 レタスは食べやすい大きさに手でちぎり、洗ってしっかり水気を切る。 カニカマは食べやすくほぐす。 ② 全体を和える ボウルにレタス・カニカマを入れる。 鶏ガラスープの素・きび糖・ごま油・白いりごまを加え、全体をよく和える。 ③ 味を調える 味をみて、塩気が足りなければ塩を加える。 全体をサッと混ぜ合わせたら完成♪ ⸻ Addictive Lettuce & Imitation Crab Salad 【Ingredients (Serves 2–3)】 ・1 Small Head Lettuce (about 200g) ・10 Imitation Crab Sticks 〈Seasoning Mix〉 ・2 Tsp Chicken Stock Powder ・1/2 Tsp Cane Sugar ・1 1/2 Tbsp Sesame Oil ・2 Tsp White Sesame Seeds ・Salt, to Taste 【Instructions】 ① Prep Tear the lettuce into bite-sized pieces. Wash and drain thoroughly. Shred the imitation crab sticks. ② Toss Everything Together Add the lettuce and imitation crab to a bowl. Add the chicken stock powder, cane sugar, sesame oil, and white sesame seeds. Toss well to combine. ③ Season Taste and add salt if needed. Toss briefly and serve.

著作権楽曲
524 いいね 524投稿から5日16時間7分後
(136時間)

(2026.09.24 12:14時点で取得)
3 コメント 3投稿から5日16時間7分後
(136時間)

(2026.09.24 12:14時点で取得)
14 シェア 14投稿から5日16時間7分後
(136時間)

(2026.09.24 12:14時点で取得)
307 保存 307投稿から5日16時間7分後
(136時間)

(2026.09.24 12:14時点で取得)
4 DL 4投稿から5日16時間7分後
(136時間)

(2026.09.24 12:14時点で取得)
2026.09.24 12:14 時点 暫定・あと7日で確定 投稿から5日16時間7分後(136時間)
0:17
10,191 10,191回再生 投稿から6日18時間11分後(162時間)(2026.09.24 12:14時点で取得) 暫定・あと5日で確定

『手羽中の甘辛ポン酢チキン』 【材料】(2〜3人分) ・鶏手羽中 … 300g(約10本) ・片栗粉 … 大さじ2 ・こめ油 … 大さじ2〜 ・ポン酢 … 大さじ3 ・砂糖 … 小さじ2 ・白ごま … 小さじ1 ・ブラックペッパー … 適量 ⸻ 【作り方】(3工程) ① 下準備 手羽中と片栗粉をポリ袋に入れ、全体によくまぶす。 ② 焼く フライパンにこめ油を入れて中火で熱し、皮目を下にして並べる。 弱中火にし、皮がパリッときつね色になるまで3〜4分焼く。 裏返して2〜3分、焼き色がついたらOK。 ③ 味付け ポン酢・砂糖を加えて全体に絡め、弱火にしてフタをし2〜3分蒸し焼き。 フタを外して中火に戻し、タレを煮絡めながら1〜2分加熱する。 とろみと照りが出たら、白ごま・ブラックペッパーをふって完成。 ⸻ 【ポイント】 ・皮目はじっくり3〜4分焼くと、パリッと香ばしく仕上がります ・ポン酢×砂糖で酸味がまろやかになり、ご飯にもお酒にも相性抜群 ※お子様が食べる場合は、ブラックペッパーなしでもOK◎ Sweet & Savory Ponzu Chicken Wings (Tebanaka) Ingredients (Serves 2–3) • Chicken mid-wings (tebanaka) … 300 g (about 10 pieces) • Potato starch … 2 Tbsp • Rice oil … 2 Tbsp or more • Ponzu sauce … 3 Tbsp • Sugar … 2 tsp • White sesame seeds … 1 tsp • Black pepper … to taste ⸻ Instructions (3 Steps) 1. Prep Place the chicken wings and potato starch in a plastic bag. Seal and shake well until evenly coated. 2. Pan-fry Heat the rice oil in a frying pan over medium heat. Place the chicken skin-side down and reduce to medium-low heat. Cook for 3–4 minutes until the skin is crispy and golden. Flip and cook the other side for 2–3 minutes until nicely browned. 3. Season Add the ponzu sauce and sugar, toss to coat. Cover with a lid and steam over low heat for 2–3 minutes. Remove the lid, return to medium heat, and simmer while coating the chicken with the sauce for 1–2 minutes. Once glossy and slightly thickened, sprinkle with white sesame seeds and black pepper. ⸻ Tips • Cooking the skin slowly for 3–4 minutes makes it extra crispy and flavorful. • The combination of ponzu and sugar creates a mellow sweet-tangy flavor that pairs perfectly with rice or drinks. For kids, you can skip the black pepper. #料理 #cooking #japanesefood #yummy

著作権楽曲
275 いいね 275投稿から6日18時間11分後
(162時間)

(2026.09.24 12:14時点で取得)
4 コメント 4投稿から6日18時間11分後
(162時間)

(2026.09.24 12:14時点で取得)
11 シェア 11投稿から6日18時間11分後
(162時間)

(2026.09.24 12:14時点で取得)
146 保存 146投稿から6日18時間11分後
(162時間)

(2026.09.24 12:14時点で取得)
4 DL 4投稿から6日18時間11分後
(162時間)

(2026.09.24 12:14時点で取得)
2026.09.24 12:14 時点 暫定・あと5日で確定 投稿から6日18時間11分後(162時間)
0:17
69,767 69,767回再生 投稿から8日15時間9分後(207時間)(2026.09.24 12:14時点で取得) 暫定・あと4日で確定

『パリパリ鶏の香味ポン酢がけ』 【材料(2人分)】 ・鶏もも肉…1枚 ・塩こしょう…適量 ・片栗粉…大さじ1 〈香味ポン酢だれ〉 ・ポン酢…大さじ2 ・ごま油…大さじ1 ・万能ねぎ…2本 ・おろし生姜…小さじ1 ⸻ 【作り方(3工程)】 ① 下準備 鶏もも肉は厚い部分に切り込みを入れ、厚さを均一にする。 両面に塩こしょうをふる。 万能ねぎは小口切りにする。 ⸻ ② パリッと焼く 鶏もも肉の身の面に片栗粉をまぶす。 フライパンに皮目を下にして入れ、弱めの中火で約10分じっくり焼く。 皮目がこんがりパリッと焼けたら裏返し、さらに4〜5分焼いて中まで火を通す。 ⸻ ③ 香味ポン酢だれをかける 鶏肉を焼いている間に、ポン酢・ごま油・万能ねぎ・おろし生姜を混ぜ合わせる。 焼き上がった鶏肉を食べやすい大きさに切って器に盛り、香味ポン酢だれをかけたら完成。 ⸻ Crispy Chicken with Savory Ponzu Sauce 【Ingredients (Serves 2)】 * 1 Chicken Thigh * Salt & Pepper, to Taste * 1 Tbsp Potato Starch 〈Savory Ponzu Sauce〉 * 2 Tbsp Ponzu * 1 Tbsp Sesame Oil * 2 Green Onions * 1 Tsp Grated Ginger ⸻ 【Directions – 3 Steps】 ① Prep Score the thicker parts of the chicken to make the thickness even. Season both sides with salt and pepper. Thinly slice the green onions. ② Cook Until Crispy Coat only the meat side of the chicken with potato starch. Place the chicken skin-side down in a frying pan and cook over medium-low heat for about 10 minutes. Once the skin is golden and crispy, flip and cook for another 4–5 minutes, or until cooked through. ③ Finish While the chicken is cooking, mix the ponzu, sesame oil, green onions, and grated ginger. Slice the cooked chicken into bite-sized pieces and place on a serving plate. Pour the savory ponzu sauce over the chicken and serve.

著作権楽曲
1,512 いいね 1,512投稿から8日15時間9分後
(207時間)

(2026.09.24 12:14時点で取得)
2 コメント 2投稿から8日15時間9分後
(207時間)

(2026.09.24 12:14時点で取得)
170 シェア 170投稿から8日15時間9分後
(207時間)

(2026.09.24 12:14時点で取得)
1,020 保存 1,020投稿から8日15時間9分後
(207時間)

(2026.09.24 12:14時点で取得)
42 DL 42投稿から8日15時間9分後
(207時間)

(2026.09.24 12:14時点で取得)
2026.09.24 12:14 時点 暫定・あと4日で確定 投稿から8日15時間9分後(207時間)
0:17
29,647 29,647回再生 投稿から9日19時間9分後(235時間)(2026.09.24 12:14時点で取得) 暫定・あと2日で確定

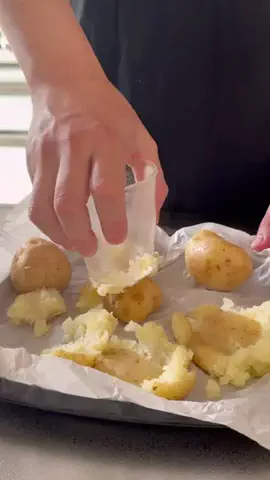
『カリほく♪のり塩ポテト』 【材料(3〜4人分)】 ・じゃがいも…500g ・片栗粉…大さじ3 ・オリーブオイル…大さじ2〜 ・青のり…小さじ2 ・コンソメ…小さじ1と1/2 ・塩…少々 ⸻ 【作り方(3工程)】 ① じゃがいもを加熱する じゃがいもはよく洗って芽を取り除き、皮付きのままくし切りにする。 耐熱容器に入れてふんわりラップをし、電子レンジ600Wで5分〜加熱する。 竹串が少し抵抗を感じながら刺さる程度を目安に、かたい場合は追加で加熱する。 粗熱と表面の水分を軽く飛ばし、片栗粉を全体に薄くまぶす。 ⸻ ② カリッと焼く フライパンにオリーブオイル大さじ2を入れて中火で熱し、じゃがいもを並べる。 あまり触りすぎず、焼き色がついたら返しながら、全面をこんがりカリッと焼く。 途中で油が足りなくなったら、少量ずつ追加する。 ⸻ ③ のり塩で仕上げる じゃがいもがカリッと焼けたらボウルに取り出す。 青のり・コンソメ・塩を加え、熱いうちにサッと全体を和えたら完成。 ⸻ 【ポイント】 ・レンジでは完全にやわらかくせず、竹串が少し抵抗を感じながら刺さる程度にすると崩れにくくなります。 ・片栗粉はじゃがいもの表面の水分を軽く飛ばしてから、薄く均一にまぶすのがポイント。 ・フライパンに並べたら何度も動かさず、しっかり焼き色がついてから返すとカリッと仕上がります。 ・油が少なくなったら途中で少量ずつ追加してください。 ・焼き上がったら熱いうちに青のりとコンソメを和えると、味がしっかり絡みます。 Crispy Aonori Potatoes 【Ingredients (Serves 3–4)】 * 500g Potatoes * 3 Tbsp Potato Starch * 2 Tbsp+ Olive Oil * 2 Tsp Aonori * 1½ Tsp Consommé Powder * Salt, to Taste ⸻ 【Instructions】 ① Microwave the Potatoes Wash the potatoes well and remove any sprouts. Cut them into wedges, leaving the skin on. Place in a microwave-safe bowl, loosely cover with plastic wrap, and microwave at 600W for 5 min or longer. Cook until a skewer goes through with a little resistance. Microwave a little longer if needed. Let some of the steam and surface moisture evaporate, then lightly coat the potatoes with potato starch. ⸻ ② Pan-Fry Until Crispy Heat 2 Tbsp olive oil in a frying pan over medium heat. Add the potatoes and cook without moving them too much. Turn them once browned and cook until golden and crispy on all sides. If the pan becomes dry, add a little more olive oil as needed. ⸻ ③ Season Once crispy, transfer the potatoes to a bowl. Add the aonori, consommé powder, and salt. Toss quickly while the potatoes are still hot, and serve. ⸻ 【Tips】 * Don’t microwave the potatoes until completely soft. Leaving them slightly firm helps prevent them from falling apart while pan-frying. * Let excess surface moisture evaporate before coating with potato starch. This helps them crisp up nicely. * Avoid moving the potatoes too much while cooking. Let each side brown before turning. * Add a little more olive oil if the pan becomes dry. * Toss the potatoes with the aonori and consommé powder while they’re still hot so the seasoning coats them evenly.

著作権楽曲
775 いいね 775投稿から9日19時間9分後
(235時間)

(2026.09.24 12:14時点で取得)
4 コメント 4投稿から9日19時間9分後
(235時間)

(2026.09.24 12:14時点で取得)
39 シェア 39投稿から9日19時間9分後
(235時間)

(2026.09.24 12:14時点で取得)
442 保存 442投稿から9日19時間9分後
(235時間)

(2026.09.24 12:14時点で取得)
11 DL 11投稿から9日19時間9分後
(235時間)

(2026.09.24 12:14時点で取得)
2026.09.24 12:14 時点 暫定・あと2日で確定 投稿から9日19時間9分後(235時間)
0:17
21,561 21,561回再生 投稿から10日18時間42分後(258時間)(2026.09.24 12:14時点で取得) 暫定・あと1日で確定

『韓国風チーズ焼きビビンバ』 【材料(2人分)】 ・ご飯…250g ・市販のキムチ(こくうま使用)…80g ・ごま油…大さじ2 ・ピザ用チーズ…50g (仕上げ) ・刻みネギ…5g ・卵黄…1個 ・マヨネーズ…適量 ・韓国海苔…少量 ⸻ 作り方 ① 下準備 青ネギを刻む。 キムチを食べやすい大きさに刻む。 ⸻ ② 蒸し焼きにする フライパンにご飯を入れ、キムチ・ごま油・ピザ用チーズを加える。 蓋をして中火で蒸し焼きにし、チーズが溶けるまで加熱する。 蓋を外し、ご飯の底におこげがつくまで焼く。 ⸻ ③ 盛り付け 器に盛り、刻みネギ・卵黄・マヨネーズをのせる。 韓国海苔を手でちぎって散らしたら完成。 Korean-Style Cheesy Bibimbap Ingredients (2 servings) • Cooked rice…250g • Kimchi…80g • Sesame oil…2 tbsp • Pizza cheese (shredded cheese)…50g Toppings • Chopped green onions…5g • Egg yolk…1 • Mayonnaise…to taste • Korean seaweed…a small amount ⸻ Instructions ① Prep Finely chop the green onions. Cut the kimchi into bite-size pieces. ⸻ ② Cook Add the rice to a frying pan, then add the kimchi, sesame oil, and shredded cheese. Cover and cook over medium heat until the cheese melts. Remove the lid and continue cooking until the bottom of the rice becomes crispy. ⸻ ③ Finish Transfer to a bowl and top with chopped green onions, egg yolk, and mayonnaise. Tear Korean seaweed by hand and sprinkle on top. Enjoy! #cooking #japanesefood #yummy

著作権楽曲
670 いいね 670投稿から10日18時間42分後
(258時間)

(2026.09.24 12:14時点で取得)
9 コメント 9投稿から10日18時間42分後
(258時間)

(2026.09.24 12:14時点で取得)
32 シェア 32投稿から10日18時間42分後
(258時間)

(2026.09.24 12:14時点で取得)
272 保存 272投稿から10日18時間42分後
(258時間)

(2026.09.24 12:14時点で取得)
7 DL 7投稿から10日18時間42分後
(258時間)

(2026.09.24 12:14時点で取得)
2026.09.24 12:14 時点 暫定・あと1日で確定 投稿から10日18時間42分後(258時間)
0:17
73,061 73,061回再生 投稿から11日17時間1分後(281時間)(2026.09.24 12:14時点で取得) 確定待ち

『鮭ときのこのホイル焼き』 材料(2人分)※ホイル焼き2個分 秋鮭(骨抜き)…2切れ(200g) 玉ねぎ…1/2個(50g) しめじ…1/2(50g) 醤油…小さじ2 粗挽きこしょう…適量 マヨネーズ…適量 有塩バター…5g 刻みネギ…適量 手順 ①下準備 ・玉ねぎは火が通りやすくする為薄切り ・しめじ石付きを取りバラす ・ネギを小口切り ②アルミホイルに玉ねぎ→しめじ→鮭をのせ、アルミホイルから液が漏れないように周りを折る。 その後、醤油→マヨネーズをかける ③ オーブントースターでお好みの焼き加減まで加熱後取り出し、有塩バター・刻みネギをかけて完成。 ※240℃のオーブントースターで10分〜15分加熱しました。 Salmon & Mushroom Foil Bake Ingredients (2 servings) Makes 2 foil packets • Salmon (boneless)…2 fillets (200g) • Onion…1/2 (50g) • Shimeji mushrooms…1/2 pack (50g) • Soy sauce…2 tsp • Coarsely ground black pepper…to taste • Mayonnaise…to taste • Salted butter…5g • Chopped green onions…to taste ⸻ Instructions ① Prep • Thinly slice the onion • Remove stems and separate shimeji mushrooms • Chop green onions ⸻ ② Assemble Place onion → shimeji → salmon on aluminum foil. Fold the edges tightly to seal and prevent leakage. Drizzle soy sauce, then mayonnaise. ⸻ ③ Bake & Finish Bake in a toaster oven until cooked through. Remove, then top with butter and green onions. Bake at 240°C (465°F) for 10–15 minutes #鮭のホイル焼き #cooking #japanesefood #料理

著作権楽曲
1,191 いいね 1,191投稿から11日17時間1分後
(281時間)

(2026.09.24 12:14時点で取得)
6 コメント 6投稿から11日17時間1分後
(281時間)

(2026.09.24 12:14時点で取得)
103 シェア 103投稿から11日17時間1分後
(281時間)

(2026.09.24 12:14時点で取得)
741 保存 741投稿から11日17時間1分後
(281時間)

(2026.09.24 12:14時点で取得)
25 DL 25投稿から11日17時間1分後
(281時間)

(2026.09.24 12:14時点で取得)
2026.09.24 12:14 時点 確定待ち 投稿から11日17時間1分後(281時間)
6:23
63,391 63,391回再生 投稿から12日5時間18分後(293時間)(2026.09.24 12:14時点で取得) 確定待ち

【ASMR】簡単レシピ動画まとめ♪Easy Recipes♪

2,374 いいね 2,374投稿から12日5時間18分後
(293時間)

(2026.09.24 12:14時点で取得)
13 コメント 13投稿から12日5時間18分後
(293時間)

(2026.09.24 12:14時点で取得)
148 シェア 148投稿から12日5時間18分後
(293時間)

(2026.09.24 12:14時点で取得)
1,156 保存 1,156投稿から12日5時間18分後
(293時間)

(2026.09.24 12:14時点で取得)
10 DL 10投稿から12日5時間18分後
(293時間)

(2026.09.24 12:14時点で取得)
2026.09.24 12:14 時点 確定待ち 投稿から12日5時間18分後(293時間)
0:30
4,192 4,192回再生 投稿から12日18時間38分後(306時間)(2026.09.24 12:14時点で取得) 確定待ち

『厚切りベーコンとトマトのピザトースト』 (マルゲリータ風) 【材料(1人分)】 ・食パン…1枚 ・厚切りベーコン…20g ・ミニトマト…2個 ・ケチャップ…大さじ1 ・ピザ用チーズ…30g ・オリーブオイル…小さじ1/2 ・粗びき黒こしょう…適量 ・乾燥バジル…適量(お好みで) ⸻ 【作り方(3工程)】 ① 下準備 厚切りベーコンは食べやすい大きさに切る。 ミニトマトは半分に切る。 ⸻ ② 具材をのせる 食パンにケチャップを塗り、ピザ用チーズを全体に広げる。 厚切りベーコンとミニトマトをバランスよくのせ、粗びき黒こしょうをふる。 ⸻ ③ こんがり焼く 240℃に設定したオーブンレンジで5分〜、パンがこんがりしてチーズがとろけるまで焼く。 仕上げにオリーブオイルを回しかけ、お好みで乾燥バジルをふったら完成♪ ⸻ 【ポイント】 ・厚切りベーコンの旨みと、焼いて甘みが増したミニトマトが相性抜群♪ ・仕上げにオリーブオイルを少量かけることで、香りとコクがアップします。 ・乾燥バジルはお好みで。加えるとよりピザらしい香りに仕上がります。 ・加熱時間はオーブンレンジや食パンの厚さによって異なるため、様子を見ながら調整してください。 ・パンが焦げそうな場合は、途中でアルミホイルをかぶせてください。 ⸻ Thick-Cut Bacon & Tomato Pizza Toast 【Ingredients (Serves 1)】 ・1 Slice of Bread ・20g Thick-Cut Bacon ・2 Cherry Tomatoes ・1 tbsp Ketchup ・30g Pizza Cheese ・1/2 tsp Olive Oil ・Coarsely Ground Black Pepper, to taste ・Dried Basil, optional ⸻ 【Instructions】 ① Prep Cut the thick-cut bacon into bite-size pieces. Cut the cherry tomatoes in half. ⸻ ② Add the Toppings Spread the ketchup over the bread, then evenly add the pizza cheese. Top with the bacon and cherry tomatoes, then sprinkle with coarsely ground black pepper. ⸻ ③ Bake Bake at 240°C (465°F) for 5 minutes or longer, until the cheese is melted and the bread is golden. Finish with a drizzle of olive oil and dried basil if desired. ⸻ 【Tips】 ・Thick-cut bacon and roasted tomatoes make a rich, savory combination. ・A little olive oil at the end adds extra flavor and aroma. ・Add dried basil for a more classic pizza flavor. ・Cooking time may vary depending on your oven and the thickness of the bread.

著作権楽曲
188 いいね 188投稿から12日18時間38分後
(306時間)

(2026.09.24 12:14時点で取得)
1 コメント 1投稿から12日18時間38分後
(306時間)

(2026.09.24 12:14時点で取得)
2 シェア 2投稿から12日18時間38分後
(306時間)

(2026.09.24 12:14時点で取得)
37 保存 37投稿から12日18時間38分後
(306時間)

(2026.09.24 12:14時点で取得)
1 DL 1投稿から12日18時間38分後
(306時間)

(2026.09.24 12:14時点で取得)
2026.09.24 12:14 時点 確定待ち 投稿から12日18時間38分後(306時間)
0:17
7,441 7,441回再生 投稿から16日18時間22分後(402時間)(2026.09.24 12:14時点で取得) 確定待ち

『水菜と韓国海苔のやみつきサラダ』 【材料(2〜3人分)】 ・水菜 … 1袋 ・白いりごま … 大さじ1 ・ポン酢 … 大さじ2 ・ごま油 … 大さじ1 ・韓国海苔 … 1袋(8枚入り) ⸻ 【作り方(3工程)】 ① 下準備 水菜をよく洗い、しっかり水気を拭き取る。 4cm幅に切る。 ② 和える 大きめの器に、水菜・白いりごま・ポン酢・ごま油を入れる。 韓国海苔を手でちぎりながら加える。 ③ 仕上げ 底からすくうようにしっかり混ぜ、全体がなじんだら器に盛り付けて完成。 ⸻ Korean Seaweed & Mizuna Salad Serves: 2–3 Ingredients ・1 Bag Mizuna (Japanese Mustard Greens) ・1 Tbsp White Sesame Seeds ・2 Tbsp Ponzu (Citrus Soy Sauce) ・1 Tbsp Sesame Oil ・1 Pack Korean Seaweed (8 Sheets) ⸻ Instructions ① Prep Wash the mizuna well and pat dry thoroughly. Cut into 4 cm (about 1½ inch) lengths. ② Combine Add the mizuna, sesame seeds, ponzu, and sesame oil to a large bowl. Tear the Korean seaweed into pieces by hand and add it to the bowl. ③ Finish Mix well from the bottom up until everything is evenly coated. Transfer to a serving bowl and enjoy. ⸻ Tips ・Make sure to dry the mizuna well to prevent the dressing from becoming diluted. ・Add the Korean seaweed just before serving to keep its texture. ・A quick and easy side dish that’s also great with drinks.

200 いいね 200投稿から16日18時間22分後
(402時間)

(2026.09.24 12:14時点で取得)
1 コメント 1投稿から16日18時間22分後
(402時間)

(2026.09.24 12:14時点で取得)
5 シェア 5投稿から16日18時間22分後
(402時間)

(2026.09.24 12:14時点で取得)
93 保存 93投稿から16日18時間22分後
(402時間)

(2026.09.24 12:14時点で取得)
0 DL 0投稿から16日18時間22分後
(402時間)

(2026.09.24 12:14時点で取得)
2026.09.24 12:14 時点 確定待ち 投稿から16日18時間22分後(402時間)
0:17
38,475 38,475回再生 投稿から17日18時間42分後(426時間)(2026.09.24 12:14時点で取得) 確定待ち

『半熟たまごとカボチャのサラダ』 【材料(2人分)】 ・かぼちゃ…1/8カット(種を取って約200g) ・卵…2個 〈調味料〉 ・マヨネーズ…大さじ3 ・コンソメ…小さじ2 ・塩・こしょう…適量 ⸻ 【作り方(3工程)】 ① 半熟たまごを作る 沸騰したお湯に、冷蔵庫から出した卵を入れる。 殻の丸い方にピンで穴を開け、中火で7分茹でる。 茹で上がったら冷水で冷まし、殻をむく。 ⸻ ② かぼちゃを加熱する 種を取ったかぼちゃを1cm幅に切り、耐熱容器に入れる。 ふんわりラップをして、電子レンジ600Wで6分加熱する。 ⸻ ③ 混ぜる 加熱したかぼちゃに、半熟たまご・マヨネーズ・コンソメ・塩・こしょうを加える。 スプーンでたまごを粗めに崩しながら、全体を優しく混ぜ合わせたら完成♪ ⸻ 【ポイント】 ・かぼちゃが熱いうちに混ぜると、味がしっかり馴染みます♪ ・半熟たまごは粗めに崩すと、黄身のコクと食感を楽しめます。 ・電子レンジの加熱時間は、かぼちゃの大きさや機種によって調整してください。 ⸻ Soft-Boiled Egg & Pumpkin Salad 【Ingredients (Serves 2)】 ・200g Pumpkin ・2 Eggs 〈Seasoning Mix〉 ・3 tbsp Mayonnaise ・2 tsp Consommé Powder ・Salt & Pepper to taste ⸻ 【Instructions】 ① Make the Soft-Boiled Eggs Gently add the eggs straight from the refrigerator to boiling water. Pierce the rounded end of each egg with a pin and boil over medium heat for 7 minutes. Cool in cold water, then peel. ⸻ ② Cook the Pumpkin Remove the seeds and cut the pumpkin into 1cm-thick slices. Place in a microwave-safe container, cover loosely with plastic wrap, and microwave at 600W for 6 minutes. ⸻ ③ Mix Add the soft-boiled eggs, mayonnaise, consommé powder, salt, and pepper to the hot pumpkin. Gently break up the eggs with a spoon and mix everything together. ⸻ 【Tips】 ・Mix while the pumpkin is still hot so the flavors blend well. ・Keep the eggs slightly chunky for a creamy, rich texture. ・Microwave time may vary depending on your microwave and the size of the pumpkin pieces.

837 いいね 837投稿から17日18時間42分後
(426時間)

(2026.09.24 12:14時点で取得)
3 コメント 3投稿から17日18時間42分後
(426時間)

(2026.09.24 12:14時点で取得)
57 シェア 57投稿から17日18時間42分後
(426時間)

(2026.09.24 12:14時点で取得)
440 保存 440投稿から17日18時間42分後
(426時間)

(2026.09.24 12:14時点で取得)
12 DL 12投稿から17日18時間42分後
(426時間)

(2026.09.24 12:14時点で取得)
2026.09.24 12:14 時点 確定待ち 投稿から17日18時間42分後(426時間)
0:17
1,789 1,789回再生 投稿から1時間30分後(2026.09.05 21:16時点で取得) 確定待ち

『ヤンニョム風唐揚げおにぎり』 材料(2人分) ・唐揚げ … 4個 ・スイートチリソース … 大さじ2 ・ケチャップ … 大さじ2 ・白いりごま … 小さじ2 ・温かいご飯 … 250g ・グリーンリーフ … 2枚 ・おにぎり用海苔 … 適量 ⸻ 作り方(3工程) ① 和える 唐揚げにスイートチリソース・ケチャップ・白いりごまを加え、全体にしっかり絡める。 グリーンリーフは一口大にちぎっておく。 ② 包む ラップにご飯 → グリーンリーフ → ソースを絡めた唐揚げをのせる。 周りのご飯で包みながら、ラップを使っておにぎりの形に握る。 ③ 仕上げ 海苔を巻いたら完成。 ⸻ ポイント ・甘辛ソースが唐揚げに絡むことで、冷めても美味しい◎ ・グリーンリーフを入れると、こってり感が和らぎ食べやすくなります。 ・ボリューム満点で、これ1個でも大満足のおにぎりです。 Sweet & Spicy Karaage Onigiri Ingredients (Serves 2) • 4 pieces karaage (Japanese fried chicken) • 2 tbsp sweet chili sauce • 2 tbsp ketchup • 2 tsp white sesame seeds • 250 g warm cooked rice • 2 leaves green leaf lettuce • Nori (for wrapping), as needed ⸻ Directions (3 Steps) ① Mix Combine the karaage, sweet chili sauce, ketchup, and white sesame seeds. Toss well until evenly coated. Tear the green leaf lettuce into bite-size pieces. ② Wrap Place rice on a sheet of plastic wrap, add lettuce, then place the sauced karaage on top. Cover with more rice and shape firmly into an onigiri using the wrap. ③ Finish Wrap with nori and serve. ⸻ Tips • The sweet and spicy sauce keeps the karaage flavorful even after it cools. • Adding lettuce balances the richness and makes it easier to eat. • A hearty, satisfying onigiri that works great as a meal on its own. #cooking #japanesefood #yummy #onigiri

著作権楽曲
89 いいね 89投稿から1時間30分後
(2026.09.05 21:16時点で取得)
0 コメント 0投稿から1時間30分後
(2026.09.05 21:16時点で取得)
0 シェア 0投稿から1時間30分後
(2026.09.05 21:16時点で取得)
21 保存 21投稿から1時間30分後
(2026.09.05 21:16時点で取得)
1 DL 1投稿から1時間30分後
(2026.09.05 21:16時点で取得)
2026.09.05 21:16 時点 確定待ち 投稿から1時間30分後